How to Add a Lesson:
In this guide, we'll demonstrate how to add a "History" lesson.
-
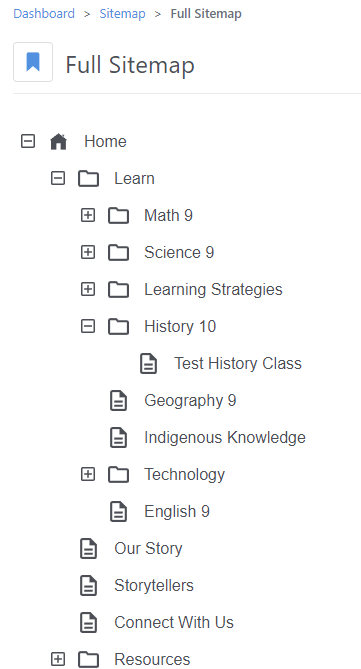
Navigate to the Sitemap: This is, in my opinion, the quickest way to get started.
-
Expand the "Learn" Section:
- Click the plus sign next to "Learn" to view its subpages.
- Locate the "History" subpage.
-
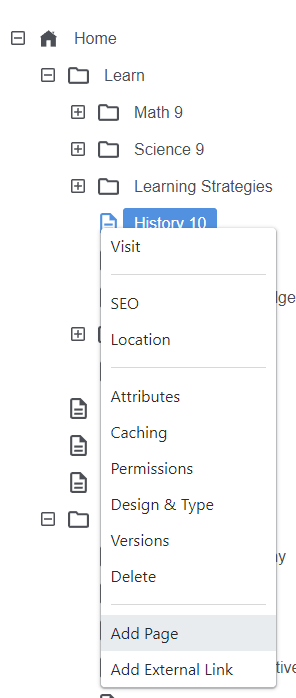
Add a New Page:
- Left-click on "History" to open its context menu.
- At the bottom of the menu, select "Add Page."
-
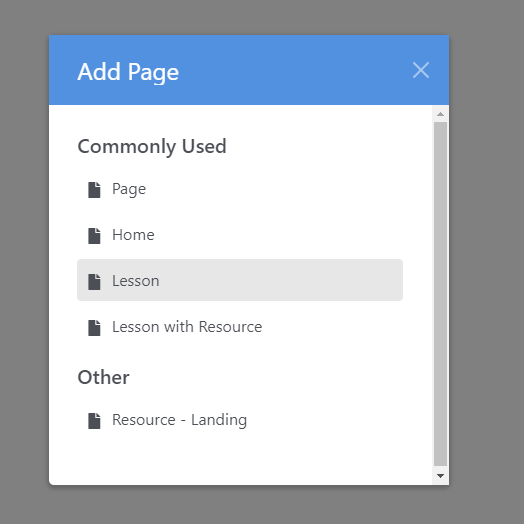
Configure Your New Page:
- You'll now see the "Add Page" dialog.
- From the list of "Commonly Used" page types, select "Lesson."
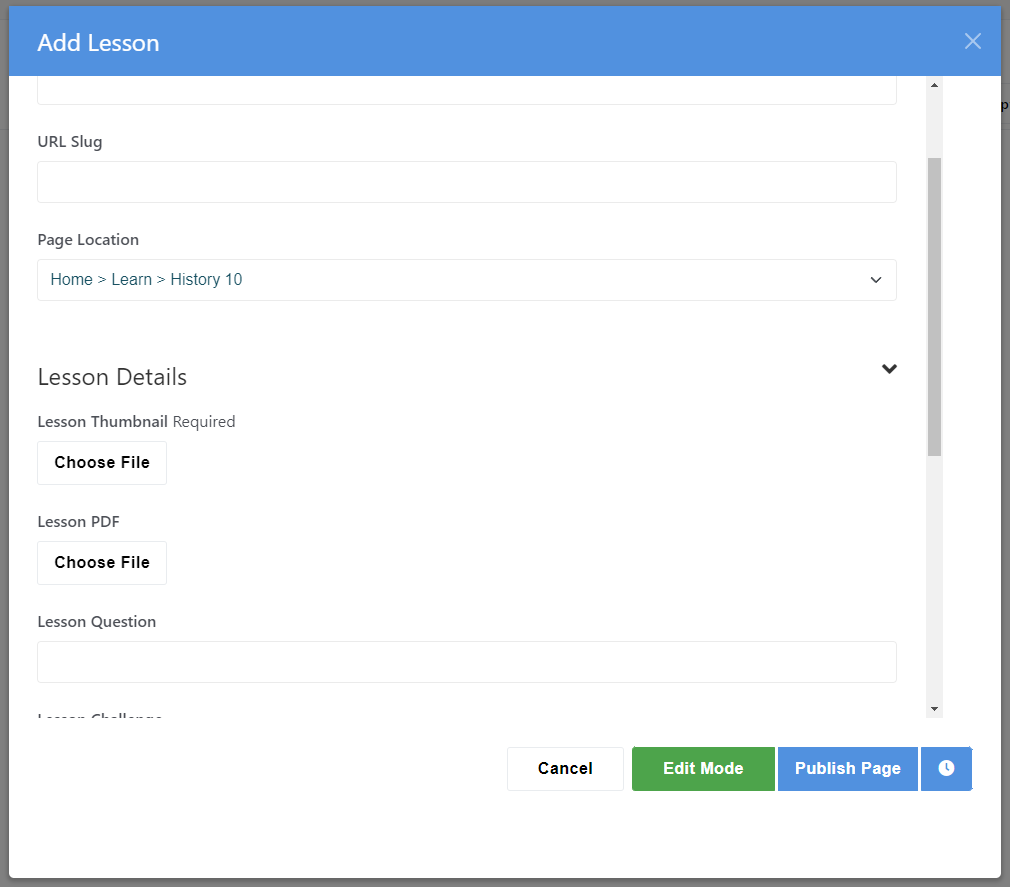
- In the subsequent dialog, set the page name (this will be the lesson title).
- Continue scrolling to fill out any remaining attributes.
- Important: A thumbnail is mandatory, as it will represent the lesson with an image inside a circle.
-
Publish Your Lesson:
- Once you've filled out all necessary information, click "Publish Page."
Note: If the attributes "Course Question" and "Course Challenge" aren't populating or the Icon is missing, be aware that they derive from the parent page's attributes. In our example of a "History" lesson, the parent page would be "History 10."
How to Add a Lesson with Resources:
-
Follow the Initial Steps:
- Begin by following the steps outlined in "How to Add a Lesson" (as described above).
- Begin by following the steps outlined in "How to Add a Lesson" (as described above).
-
Select the Appropriate Page Type:
- When prompted, choose the "Lesson with Resource" page type.

- When prompted, choose the "Lesson with Resource" page type.
-
Complete the Lesson Attributes:
- Fill out the standard attributes for the lesson as you would typically.
- Fill out the standard attributes for the lesson as you would typically.
-
Fill Out the Resource Attributes:
- Next, provide information for the additional "Resource" attributes.
- Important: Always select the "Type" attribute. This determines the nature of the resource and whether it will be displayed on the Resource page. A lesson will not appear as a resources unless it has Resource Files associated with it even if it does have the type set.
- To facilitate filtering, it's also crucial to specify the "Subject" and "Grade."

Tip: You can transform any existing lesson into a "Lesson with Resources" by simply adding and completing the relevant attributes for that specific page. These can be found under "Resource" once you are viewing any page's attributes:

You add these by simply clicking them
How to Add a Generic Resource:
-
Access the Sitemap:
- Start by navigating to the Sitemap.
- Start by navigating to the Sitemap.
-
Expand the "Resources" Section:
- Click on "Resources" to view or add generic resources.

- Click on "Resources" to view or add generic resources.
-
Initiate the Addition of a New Page:
- Left-click on "Resources."
- Similar to adding lessons, select "Add Page."

-
Configure Your New Resource Page:
- In the "Add Page" dialog, choose "Resource."

- Fill in the page name and provide a summary for the resource.
- Complete the remaining attributes.
- For the "Type" attribute:
- If adding a generic resource, select "Resource."
- If you prefer a lesson-type resource that isn't visible under lessons for students, opt for that choice.

- In the "Add Page" dialog, choose "Resource."
-
Publish Your Resource:
- After inputting all necessary details, click "Publish Page."
Note: After publishing, your newly added resource should appear at the top of the list on the "Resources" landing page, as entries are sorted by the most recent first.
How to Add Additional Filter Attributes
-
Access the Dashboard Menu:
- Begin by opening the dashboard menu.

- Begin by opening the dashboard menu.
-
Navigate to Pages and Themes:
- Click on "Pages and Themes." This action will load a new page with various options.

- Click on "Pages and Themes." This action will load a new page with various options.
-
Select Attributes:
- From the dashboard menu on the new page, click on "Attributes."

- From the dashboard menu on the new page, click on "Attributes."
-
Locate the Desired Attribute:
- Scroll until you find the "Resource" heading.

- Listed under this heading, you'll see attributes like "Grade Level," "Subject," "Type," and "Topic." These are known as list attributes.
- Click on the attribute you wish to modify. For this example, we'll select "Grade Level."
- Scroll until you find the "Resource" heading.
-
Add New Values:
- Once you're on the attribute page, scroll down until you see the "Values" section.

- Type in your new value (e.g., "8") and click "Add."
- Once you're on the attribute page, scroll down until you see the "Values" section.
-
Save Your Changes:
- After adding all desired values, click "Save" to store the modifications.
Note: After completing these steps, the new filter values will be immediately available for page assignment and for filtering resources.
How to Add New Filter Categories with New Attributes for filtering Resources
-
Navigate to the Attributes Settings Page:
- Start by following the steps from the previous guide to reach the "Attributes" settings page.
- Start by following the steps from the previous guide to reach the "Attributes" settings page.
-
Add a New Attribute:
- Scroll to the bottom and locate the "Add Attribute" label next to a dropdown menu titled "Choose Type."

- From this dropdown, select "Option List."

- Scroll to the bottom and locate the "Add Attribute" label next to a dropdown menu titled "Choose Type."
-
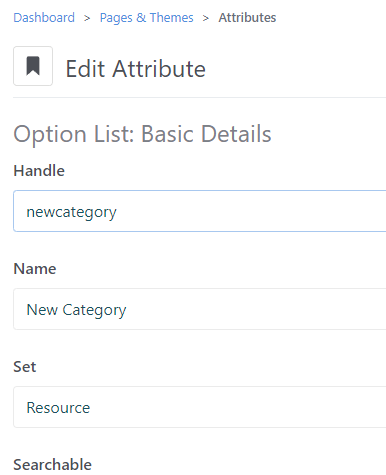
Configure the New Attribute:
- You'll be taken to a new page for setting up the attribute.
- Under "Handle," input a simple description without underscores, spaces, or special characters. Example: "newcategory."
- For "Name," provide a descriptive label (spaces allowed). Example: "New Category."
- Under the "Set" dropdown, select "Resource ."
-
Specify Attribute Options:
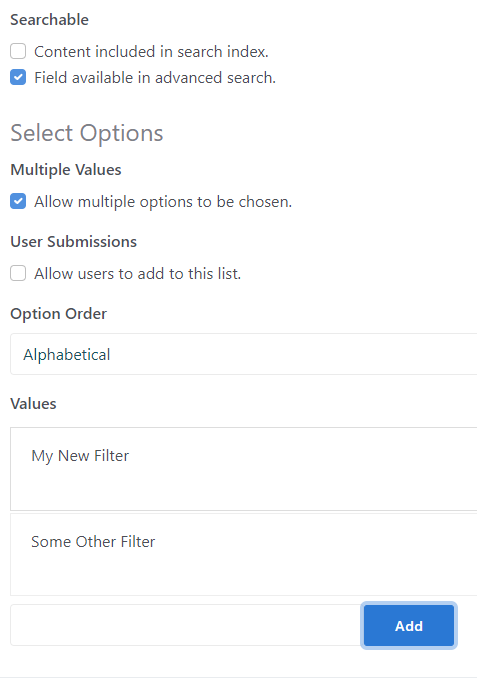
- If you want an attribute to have multiple values, enable "Multiple Values." Note that selecting this will negate the subsequent two options.
- If desired, turn off "Allow User Submission" to restrict value addition to Admin accounts only.
- Choose the display order: "Display Order" or "Alphabetical."
- Add desired values for the new filter. After inputting all values, click "ADD" to finalize the attribute category.
-
Add the New Category to Filter Sets:
- Back on the main Attributes page, click "Available Filters" under "Resource Filters."

- Scroll to "Values" and find options like "Grade," "Subject," etc.
- Add the handle of the category you created (e.g., "newcategory" or "Newcategory"). Click "Add" and then "Save."

- Back on the main Attributes page, click "Available Filters" under "Resource Filters."
-
Activate the New Category on the Resource Page:
- Return to the Site Map and select the "Resource" page.

- View its attributes and scroll until you find "Available Filters."

- Locate and check the new category. Finally, click "Save."
- Return to the Site Map and select the "Resource" page.
- How to Display the "New Category" When Adding New Pages/Resources/Lessons
-
Access the Dashboard Menu:
- Navigate using the dashboard menu to "Pages & Themes."
- Navigate using the dashboard menu to "Pages & Themes."
-
Navigate to Page Types:
- Select "Page Types."

- Select "Page Types."
-
Add the New Category to each page template:
- For each page/resource type where you'd like the "New Category" to be visible, you'll need to follow these steps:
- Locate the resource type.

- In its corresponding row, click "Edit Form."
- On the new page, you'll see a table. To the far right of this table, there's a plus sign—click it to initiate adding the new "New Category" attribute.

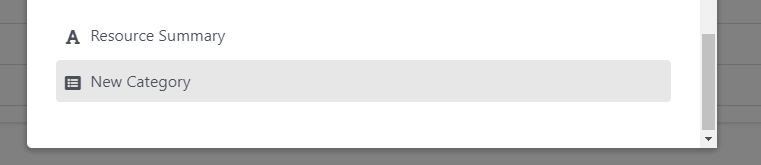
- In the dialog that appears, select "Custom Attribute." e. Scroll through the list until you find "New Category" and select it. By clicking the name it adds it to the list on the previous page.

- Locate the resource type.
- For each page/resource type where you'd like the "New Category" to be visible, you'll need to follow these steps:
-
Completion:
- You've successfully added the new attribute to the selected page type.
- Repeat the process for any other page types as needed.
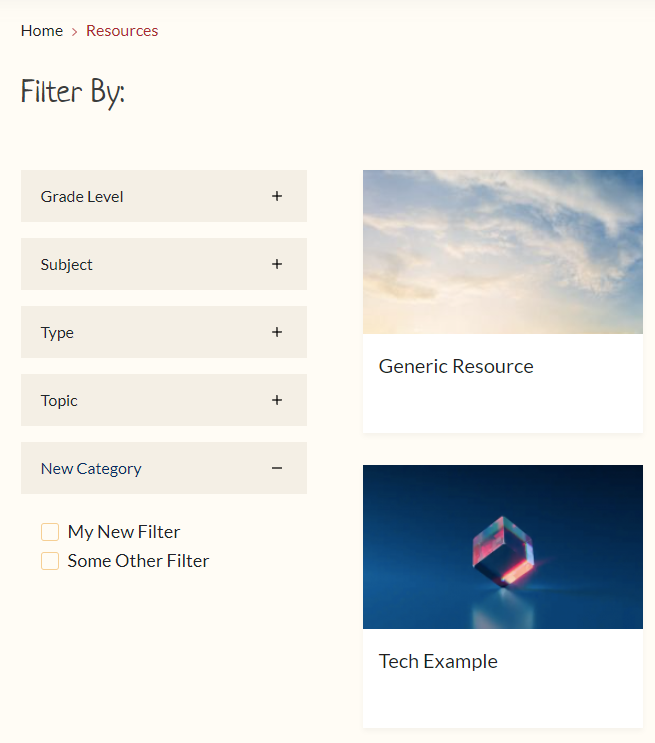
Note: With these steps completed, the new category and its attributes will now be available for use on the "Resource" page and for filtering.
Adding Images
When adding your own images to resources or sourcing online images. Please use the following as a good start
The Need for Image Compression: Compressing images can significantly decrease the overall size of our web pages. This results in faster loading times and a better experience for users.
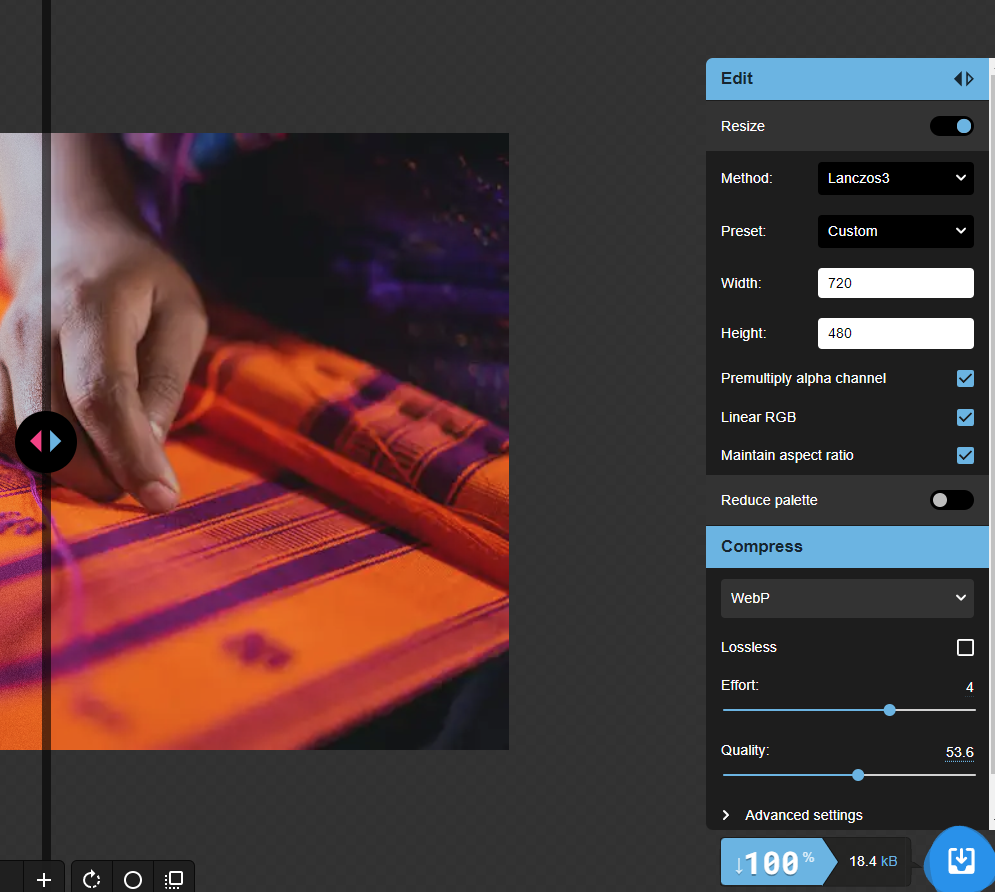
2. Using the WebP Format with 50% Compression: WebP is an efficient image format that can provide good quality at reduced file sizes. By setting the compression to around 50%, we can achieve a balance between size and visual clarity.
3. Setting Image Width to 720px: A width of 720px is ideal for our platform, as it displays well on most devices without compromising on quality or adding unnecessary bulk.
4. How to Optimize Images with Squoosh:
- Step 1: Head over to Squoosh
- Step 2: Upload your image.
- Step 3: Adjust the width to 720px.
- Step 4: Choose the WebP format and set compression to around 50%. (50% is the staring point, if the result looks terrible increase to 70%)
- Step 5: Once you're happy with how the image looks, click "Download" to get your optimized image.
Once downloaded to your computer you can upload it to the CMS.
Free to use images can be found at: https://www.pexels.com/ or https://unsplash.com/